A T-shirt is a system of panels, trims, seams, hems and measurements. This factory guide names each component and shows what to specify and inspect.
A basic T-shirt consists of a body, sleeves, a neckline finish, connecting seams, sleeve and bottom hems, labels and supporting trims. The exact number of pieces changes with the pattern: a side-seamed crewneck, a tubular body, a raglan style and a paneled tee do not break down the same way. That is why a factory does not work from a universal parts count. It works from a technical flat, a bill of materials (BOM), construction callouts and defined points of measure (POM).
A factory reads a T-shirt as body and sleeve panels, a neckline finish, seams, hems, labels, trims and defined measurement points. Each part becomes production-ready only when the technical flat, BOM, construction callouts, measurement method, tolerance and sample check all agree.
This guide stays with the garment itself. The separate T-shirt manufacturing process guide follows the longer journey from fiber to packed carton, while our parts of a hoodie guide applies the same vocabulary to a more complex garment.
What are the main parts of a T-shirt?
The main physical components are the body, sleeves and neckline finish. Seams and hems connect or finish those components; the armscye and high point shoulder are landmarks used to describe their shape and measurement. Labels, thread and reinforcement tape complete the specification even though they may be almost invisible from the outside.
| Factory term | What it is | Decision the buyer must make |
|---|---|---|
| Front and back body | Separate panels on a side-seamed tee, or a continuous tubular body | Silhouette, length, width, shaping and fabric direction |
| Sleeve | Usually set-in or raglan; other panel arrangements are possible | Shape, length, opening, pitch and hem |
| Neckband or binding | The material that finishes the neck opening | Construction, material, finished width, stretch and stitch |
| Shoulder and armscye | The upper-body connection and shaped armhole | Seam position, curve, reinforcement and fit |
| Side seam or tubular body | Two-panel connection or body without vertical side seams | Pattern shaping, alignment and measurement method |
| Sleeve and bottom hems | Finished lower edges | Fold depth, stitch type, visible needle spacing and stretch |
| Labels and trims | Brand, size, care information, thread and tape | Content, material, placement and attachment method |
There is no globally correct number of T-shirt pattern pieces. A common side-seamed crewneck may use a front, a back, two sleeves and a neckband before labels or optional details are counted. A tubular body removes the separate front-and-back body split; a raglan sleeve changes the upper-body geometry; a pocket, yoke or color-block panel adds pieces. The approved pattern and BOM, not a generic diagram, define the garment.
How should a technical flat show the components?
A useful technical flat shows the T-shirt from the views needed to remove ambiguity, then pairs those drawings with materials, measurements and construction callouts. It is a communication drawing, not necessarily a production-scale pattern. Front, back and interior details matter because a front view alone cannot show back-neck tape, label placement or the inside of a hem.
| Marker | Front-view component |
|---|---|
| 1 | Neckband or binding |
| 2 | Shoulder seam |
| 3 | Armscye |
| 4 | Sleeve and sleeve hem |
| 5 | Front body panel |
| 6 | Side seam, when present |
| 7 | Bottom hem |
| Marker | Back or interior detail |
|---|---|
| A | Back-neck tape or wider reinforcement route |
| B | Main and size presentation |
| C | Care and content label placement |
| D | Back body panel |
The drawing should agree with the BOM and measurement chart. If the flat says rib neckband but the BOM names self-fabric binding, or the flat shows a side seam while the measurements assume a tubular body, the factory has two competing instructions. The pre-production conversation then becomes a guess. A strong tech pack resolves those conflicts before material is cut.
T-shirt neckline construction
A T-shirt neckline is a small system: the shaped neck opening, a neckband or binding, the seam that attaches it, and any tape or reinforcement on the inside. Specifying only “crew neck” leaves the factory to decide too much. The drawing should state the construction, material, finished width, neckline dimensions, stitch callout and any tape coverage.
Neckband and binding are different constructions
A neckband is commonly a separate strip joined into a ring and sewn to the neck opening. A binding folds or wraps a strip around the raw edge. Suppliers may use the words differently, so the useful instruction is not the noun alone: show the cross-section and finished appearance.
Rib is common for neckbands because rib knits have high widthwise extensibility. Elastic yarn can be added to assist recovery, but a label such as “1×1 rib” or a fixed fiber percentage does not by itself prove how the collar will perform. CottonWorks' guide to single and double knits explains the structure and common trim uses. The factory still needs the actual rib specification, and the approved sample needs to demonstrate the intended hand, stretch and recovery after the agreed wash test.
Back-neck tape needs a route, not just a name
Back-neck tape finishes or covers the inside back-neck seam. A shoulder-to-shoulder instruction may extend farther across the upper garment, but the route varies with construction. Mark the start and end points, tape material, finished width, stitch line and whether the tape should be visible when the garment lies flat.
On a sample, inspect the neckline from outside and inside. Look for left-right symmetry, waviness, puckering, a twisted band join, uneven tape coverage and seam allowance that feels abrasive. Wash performance belongs in the acceptance plan, not in an assumption that a certain rib, tape or seam can never stretch.
How do shoulders, armscyes and sleeves control fit?
Shoulder position, armscye shape, sleeve cap and sleeve dimensions work as one fit system. The armscye is the shaped armhole opening into which a set-in sleeve is sewn; the term itself is defined that way by Merriam-Webster. Its depth and curve must work with the shoulder, sleeve cap, chest and bicep. That is why two tees with the same chest width can still feel different when the wearer reaches forward or raises an arm.
A set-in sleeve joins a shaped armscye around the upper arm. A raglan sleeve extends toward the neckline and creates diagonal upper-body seams, so its measurement landmarks differ from a set-in style. A dropped shoulder changes where the shoulder seam lands but does not, by itself, tell the pattern maker the sleeve length, armscye depth or intended ease.
The sample check is relational. Compare left and right sleeves, shoulder seam placement, sleeve pitch at rest, rotation around the arm and puckering at the attachment seam. Then perform the movement checks agreed for the fit. Our T-shirt fits and construction guide handles oversized, boxy, cropped and dropped-shoulder proportions in more detail; this page supplies the component vocabulary those proportions use.
Side-seamed vs tubular body construction
A side-seamed T-shirt uses separate front and back panels joined by vertical seams. A tubular body is formed without those vertical body side seams. Tubular does not mean the entire garment is seamless: sleeves, neckline and hems still require their own construction.
Separate front and back panels let a pattern maker shape the two sides independently. That can help with taper, crop, curved hems, panel work or other directional silhouettes. A tubular body follows the dimensions available from the knitted tube and needs a measurement method that does not depend on a side seam as a landmark. Neither construction is automatically premium or poor. Fabric, pattern, cutting, sewing and finishing still decide the result.
| Decision | Side-seamed body | Tubular body |
|---|---|---|
| Body pieces | Separate front and back panels | Continuous body tube |
| Vertical body side seam | Present | Absent |
| Pattern shaping | Front and back can be shaped independently | Constrained by the selected tube and pattern method |
| Measurement reference | Side seam can be a landmark | Alternative centering and alignment landmarks are required |
| Sample focus | Seam alignment, matching lengths and torque | Centering, rotational distortion and dimensional stability |
Do not predict twist from the construction name alone. Evaluate the actual garment after the agreed laundering and dimensional-change procedure. AATCC's standards index lists methods covering garment dimensional change, appearance after laundering and seam twist; the buyer and factory must still agree which method, cycle and acceptance limit apply.
How should sleeve and bottom hems be specified?
A factory specifies a hem by its fold depth, stitch construction, visible needle spacing, thread, stretch requirement and tolerance—not simply by saying “double needle.” Two parallel rows on the outside do not prove which stitch forms the underside. The technical flat and construction sheet should name the required stitch type and location.
Coats' basic stitch guide distinguishes several ISO stitch types that appear in knit-garment specifications:
| Stitch type | Construction | Possible T-shirt use | Sample inspection |
|---|---|---|---|
| 406 | Two needle threads and one looper thread form a coverseam | A common option for sleeve and bottom hems | Needle spacing, skipped stitches, stretch, tunneling and hem depth |
| 504 | One needle and two loopers form a three-thread overedge stitch | Edge neatening or a selected seam construction | Thread balance, edge coverage, seam allowance and breakage |
| 514 | Two needles and two loopers form a four-thread overedge stitch | Seam assembly where that construction is specified | Needle and looper balance, coverage, stretch and seam security |
Those numbers classify stitch formations; they do not guarantee a quality level. A 406 hem can still wave, tunnel, skip or break, and another hem construction may be correct for a particular fabric or appearance. The factory should sew the specified construction on the actual material and the buyer should approve the result. Our stitch and seam field guide goes deeper into diagnosis.
Finished sleeve hem and bottom hem depths also need defined measurement paths. Check both sleeves against each other, measure at several points if the hem can vary, inspect the underside, and stretch only to the level required by the approved test. Raw edge, split, curved and coverstitched hems are different design instructions, not interchangeable finishing labels.
Which labels and trims belong in the BOM?
Labels, thread, neckband material and reinforcement tape belong in the BOM because they affect appearance, comfort, compliance and repeatability. The BOM should give each item a reference, material, color, dimensions, supplier or approved equivalent, placement and attachment method.
The main or brand label and size presentation are brand decisions; they may be woven, printed, transferred or combined with other information. The care and content information must be planned for the destination market. In the United States, covered textile products generally disclose fiber content, country of origin and the responsible company or RN, while care instructions must be permanently attached. The FTC textile labeling guide explains the US rules. Other markets can differ, so a US placement rule should not be copied into a global specification without review.
Do not stop at “add care label.” Show its position and orientation, identify the attachment seam, define the distance from a landmark, and confirm whether the edge can touch skin. Apply the same discipline to a heat-transfer neck label, hem tag or reinforcement tape. A decorative detail becomes a factory component as soon as it needs to be purchased, placed or inspected; our private-label package guide covers the wider label system.
Which measurements define the finished T-shirt?
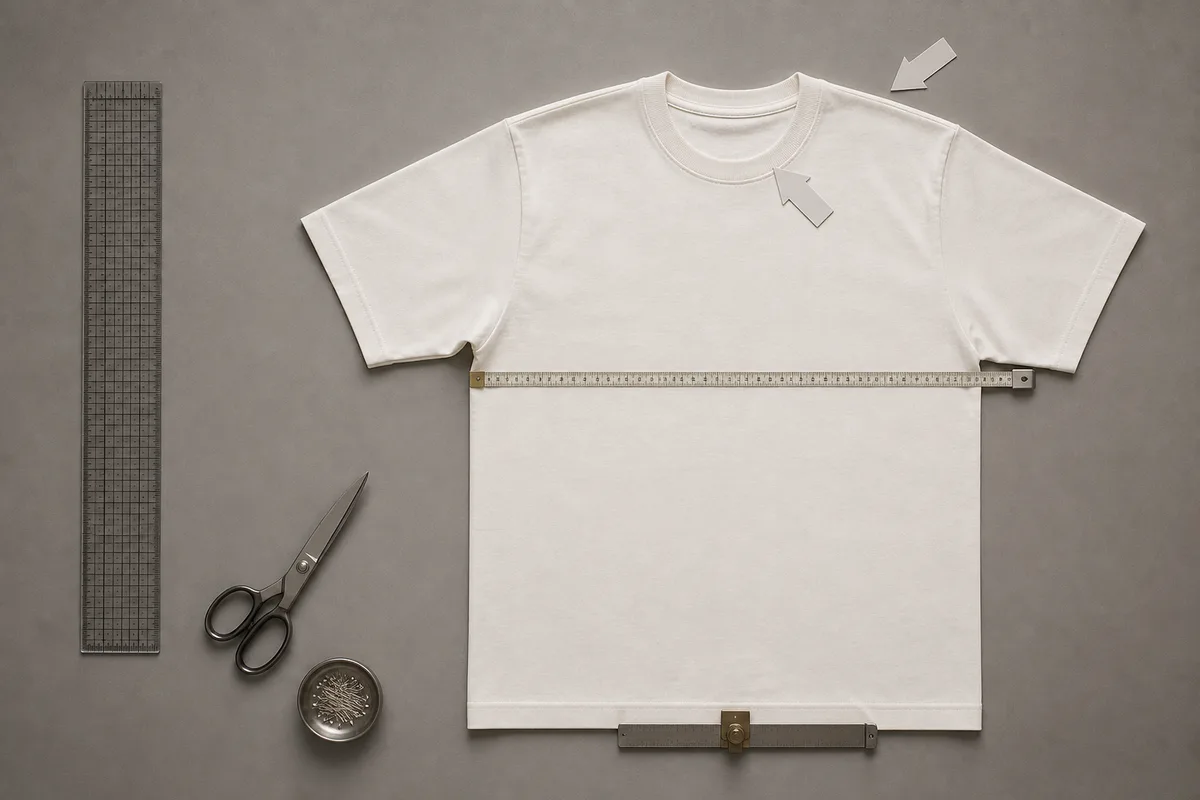
A component becomes measurable through a point of measure. Every POM needs a name, a visible landmark, a measurement path, a unit and a tolerance. HPS (high point shoulder) is commonly used near the shoulder-neckline junction as a reference for vertical measurements, but the approved diagram controls the exact point. “Length from HPS” is incomplete if the HPS landmark itself is not shown.
The following eight POMs are a practical starting set, not a universal standard:
| Marker | POM | Example measurement basis — confirm the approved diagram |
|---|---|---|
| A | Body length | From the defined HPS landmark to the finished bottom edge |
| B | Chest width | Straight across at the stated depth below the armhole |
| C | Bottom sweep | Across the finished hem at the line shown |
| D | Shoulder width | Between the defined shoulder points across the back |
| E | Sleeve length | From the stated shoulder or neck landmark to the sleeve hem |
| F | Bicep width | Across the sleeve at the stated distance below the armhole |
| G | Neck width | Between the defined inside neckline points |
| H | Front neck drop | From the stated shoulder-neck reference line to the front neckline |
Raglan, curved-hem, pocketed and engineered-panel styles need additional or different POMs. The measurement chart should also state whether the garment is measured relaxed, how it is laid flat, whether dimensions are half-girth or full-girth, and the tolerance for each size. A size specification grades those approved points across sizes; a shrinkage and tolerance plan defines when the measurements are taken and what change is acceptable.
What should a buyer specify and inspect?
The most useful factory handoff converts every named part into a defined instruction and an observable sample checkpoint. “Make the collar better” cannot be quoted or inspected consistently. “Use the approved rib, finished neckband width as shown, stitch type as called out, and pass the agreed recovery and wash checks” can.
| Component | Specify before sampling | Inspect on the sample |
|---|---|---|
| Neckband or binding | Construction, material, finished width, join, stitch and neckline dimensions | Shape, symmetry, recovery, join position, waviness and comfort |
| Tape and shoulder | Route, material, width, seam placement and shoulder position | Coverage, symmetry, puckering and seam alignment |
| Sleeve and armscye | Sleeve type, cap/curve, pitch, length, opening and attachment stitch | Left-right match, hang, rotation, movement and attachment seam |
| Body | Side-seamed or tubular, silhouette, grain/centering and body POMs | Shape, alignment, torque and measurements |
| Sleeve and bottom hems | Fold depth, stitch type, needle spacing, thread and stretch | Depth, skipped or broken stitches, tunneling, waviness and stretch |
| Labels | Required information, artwork, material, dimensions, placement and attachment | Content, position, orientation, legibility, adhesion or seam security |
| Finished garment | Measurement method, tolerance, wash/test condition and appearance standard | Approved POMs, dimensional change, seam twist and overall appearance |
A factory-ready T-shirt brief should include:
- Front and back technical flats, plus detail views for the neckline, hems and labels.
- A BOM for body fabric, neck trim, thread, tape, labels and any decoration.
- A measurement chart with diagrams, units, landmarks and tolerances.
- Construction callouts that name stitch or seam types and their locations.
- Artwork files with placement dimensions and color references.
- Label and packing requirements for the intended destination market.
- Quantity by color and size, plus the intended fit and fabric or hand-feel target.
- A reference garment or approved sample when one controls details that drawings cannot express.
Review comments should use the same component names as the flat: “left sleeve pitch,” “front neck drop” or “back-neck tape coverage,” not “this area.” That makes each correction traceable into the next sample. The sample approval checklist provides the wider approval workflow, while the AI tech-pack guide helps turn an early generated brief into production-ready instructions.
Planning a custom tee? Send Jiashun the technical flat, fabric or hand-feel target, measurement spec, artwork, label requirements, quantities and colorways. We can identify missing component decisions before preparing a project-specific quotation. The complete program is on our custom T-shirt manufacturer page.
FAQ
What are the basic parts of a T-shirt? The basic parts are the body, sleeves and neckline finish, plus the seams and hems that assemble or finish them. Labels, thread and reinforcement tape also belong in the factory specification. Optional pockets, yokes, gussets or color-block panels add more components.
How many pattern pieces are in a T-shirt? There is no universal number. A common side-seamed crewneck may begin with a front, a back, two sleeves and a neckband, but tubular, raglan, pocketed and paneled styles change that count. The approved pattern and BOM control.
What is the band around a T-shirt neck called? It is commonly called a neckband or rib collar when a separate strip is joined to the neck opening. A bound neckline uses a different edge-finishing construction, so the tech pack should show the cross-section, material, finished width and stitch rather than rely on the name alone.
What is HPS on a T-shirt size chart? HPS means high point shoulder. It is commonly used near the shoulder-neckline junction as a reference for body length and neck-drop measurements, but the exact landmark must be drawn. The approved POM diagram determines where the tape begins.
How do tubular and side-seamed T-shirts differ? A tubular body has no vertical body side seams. A side-seamed body uses separate front and back panels, which allows independent panel shaping. Neither is automatically better; suitability depends on the intended fit, fabric construction, pattern and approved sample.
Does double-needle stitching mean coverstitch? Not necessarily. Two visible needle rows describe the outside appearance, not the complete stitch formation. If the construction matters, specify the stitch type—such as 406 for a particular coverseam—and inspect both sides of the sample.
References
- CottonWorks: Single and Double Knits — rib-knit structure, extensibility and trim applications
- Coats: Seam Types — seam classification and construction vocabulary
- Coats: Basic Stitch Types — stitch types 406, 504 and 514
- Merriam-Webster: armscye — armhole definition
- US Federal Trade Commission: Threading Your Way Through the Labeling Requirements — US fiber, origin, company identification and care-label guidance
- AATCC Standards — test-method index for dimensional change, appearance after laundering and seam twist
- Browzwear 3D and Technical Design Glossary — technical-design and tech-pack vocabulary
Next steps
Continue your sourcing research
Connect this guide to the relevant production service, then compare the related decisions before sending a brief.
Custom T-Shirts
Jiashun is a one-stop custom T-shirt manufacturer in Humen, Dongguan. MOQ starts at 50 pieces; the final minimum and colorway breakdown are confirmed after project review, samples ship in 10-15 working days, and bulk production takes 20-30 working days after sample approval — fabric, fit, printing, labels and export handled under one roof.
Review this service →Related buyer guideT-Shirt Fits Explained: Oversized, Boxy, Cropped and What to Spec Before Sampling
A precise T-shirt brief must align cut, fabric weight, neckline, and stitching because every construction choice is visible. This guide translates those decisions into factory-ready terms so the first sample matches the intended fit.
Read guide →Related buyer guideFlatlock, Coverstitch, Overlock: The Stitch Classes That Decide Whether Your Hoodie Falls Apart
Every seam on a garment is one of a few ISO-classified stitch types, each with a signature you can read by flipping the garment inside out. The field guide, the SPI numbers, and what to spec.
Read guide →Related buyer guideParts of a Hoodie — and How a Factory Sews Them Together
A hoodie leaves the cutting table as roughly twenty pattern pieces. Learn what each component is called, then follow the production sequence that turns the stack into a garment.
Read guide →Related buyer guideHow Are T-Shirts Made? From Cotton Bale to Packed Carton
Follow one white tee through the whole chain: a 480-pound bale becomes yarn, the yarn becomes a knitted tube, the greige gets scoured and dyed, a marker turns fabric into panels, and twelve sewing operations finish the job in under eight minutes.
Read guide →Need this turned into a production quote?
Send your target style, fabric notes, decoration details and quantity so Jiashun can review the production path.